This contains all information about the switch to FreshBooks Payments powered by Stripe:
- If you’re migrating from Stripe Standard, select the Stripe Standard Users section to get started
- If you’re migrating from WePay, select the WePay Users section to get started
Or go to the relevant section as needed:
Stripe Standard to FreshBooks Payments Users
Moving forward, Stripe Standard will only be available for businesses outside of Canada and the US. If your business is based in Canada or the US, you’ll receive email communications to migrate your account over to FreshBooks Payments powered by Stripe for an improved experience.
Stripe Standard Migration Details
- Previously Migrated From WePay - If you previously migrated from WePay to Stripe Standard this was required to process your payments with no disruptions, the final step is to move to FreshBooks Payments for the best possible experience based on your business’ region
-
Multiple Businesses - If you have multiple businesses, a FreshBooks Payments account will also be created for each of your businesses
- Each FreshBooks business will need to be migrated to Stripe Standard separately by you, with the same email address for each FreshBooks Payments account
- Duplicate Stripe Account - You may see a duplicate of your account inside your Stripe Standard dashboard - if you see a duplicate account, do not delete this as this is part of your migration to your new FreshBooks Payments account
-
Stripe Onboarding / Know Your Customer (KYC) Form - If you use the same email address as your Stripe Standard account when creating your FreshBooks Payments account, you may have the option to re-use the same information for your onboarding
- Stripe may require you to re-enter your information if the option to use your Stripe Standard account's information is not available
- Stripe Standard Disconnection - Once you complete your migration to FreshBooks Payments powered by Stripe, your Stripe Standard account will be disconnected in your FreshBooks account
-
Recurring Payments on Recurring Templates - Once your migration is complete, all saved credit card and bank transfer information on your recurring templates will be switched over to be saved with FreshBooks Payments instead
- Expired credit card data and payment information saved after your specified transfer date on your email communications will not be transferred over for you
- Any recurring templates with saved payment information that are not transferred will continue to charge through Stripe Standard, these will be moved over to FreshBooks Payments over several months
- Client Experience - After your information has been transferred over to FreshBooks Payments, clients’ experiences with paying invoices will be the same with FreshBooks Payments
- Stripe Capital Loans - Your in-progress Capital loans will continue to be repaid with your new FreshBooks Payments account, review Stripe Capital details here
- Stripe Standard API - Stripe Standard's API is not compatible with FreshBooks Payments powered by Stripe, review FreshBooks' API documentation instead
Stripe Standard Next Steps
- In the email you’ve received, select the Switch Now button to start the process, or log into your FreshBooks account
- Go to the Dashboard
- Select the Switch Now or Upgrade Now button
![Switch now button inside a banner.]()
- You may have the option to re-use the same information from your existing Stripe Standard account for FreshBooks Payments, enter in your existing Stripe Standard account’s Email and select Submit
- Then enter the Stripe account Password and select Submit
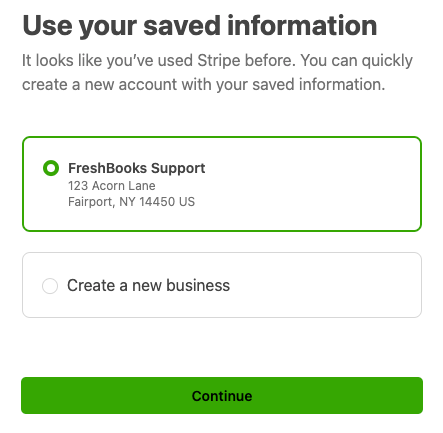
- Select the existing business saved in your Stripe Standard account, and then select Continue
- Your information will be pre-populated from your Stripe Standard account - if needed, update or confirm fields like your personal and public details, and select Continue
![Existing business selected with create a new business option underneath.]()
- In the Review and Submit section, ensure your information is correct
- If any sections display as Information required, select the Edit link
- Update the missing information and then select Continue to return to the Review and Submit section
- Otherwise if you want to enter in your information manually, or the option to use your existing Stripe Standard account is not available because Stripe requires you to re-enter it manually, enter in an Email and a new Password for your new FreshBooks Payments account, then select Next
- Enter a Phone Number, then select Send text
- Or if needed, select the authenticator app link to use an authenticator app
- Or if needed, select the security key text to use a security key
- If asked to verify with a verification link via email, the verification link must be copied and pasted in the same browser window as the one FreshBooks Payments is being set up in
- Then enter the Code from your device or authenticator app, or use the security key
- Next, save your emergency backup code by selecting Download code or Copy Code and store it somewhere safe
- Select Next
- Enter a Phone Number, then select Send text
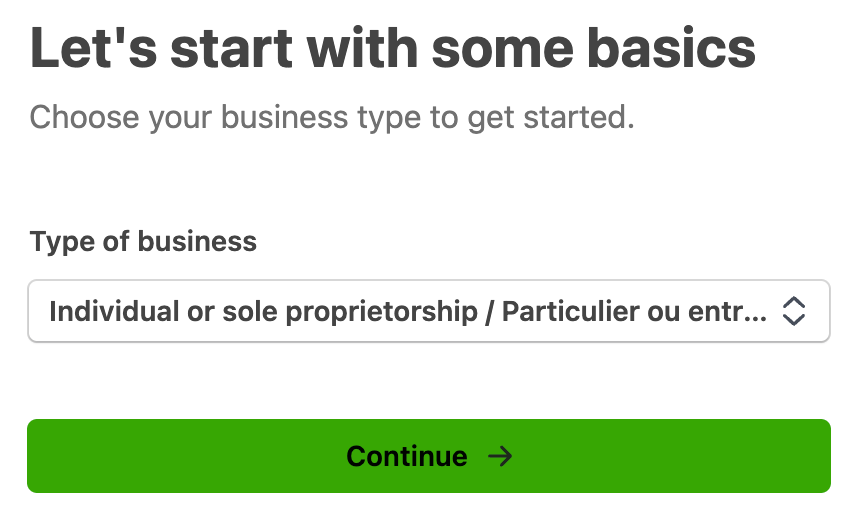
- Choose your Type of Business, then select Continue
![Type of business section with dropdown to choose type.]()
- For personal details, enter your First Name and Last Name as specified on your government-issued ID or with government agencies like the IRS or CRA
- Then enter your Email Address, Job Title, Date of Birth, Home Address, and Phone Number
- For US-based businesses, enter the Last 4 Digits of your Social Security Number
- Then select Continue
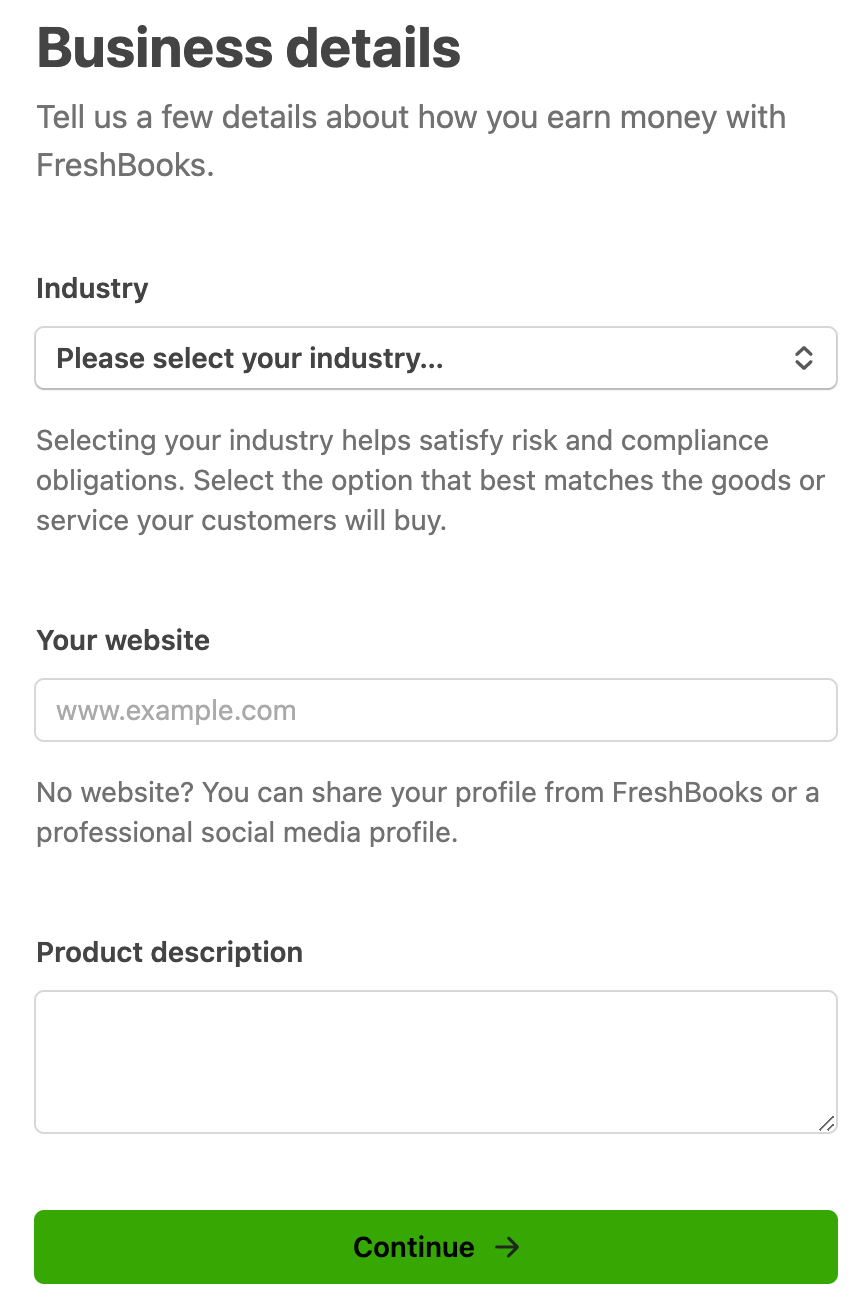
- For business details, if available, enter a Tax Number
- Next, choose an Industry
![Business details section with fields to fill out.]()
- If needed, enter a Website - note that if you enter an eligible website, the website must include the following:
- A website that is active and not under construction
- The business name clearly displayed and matching the business name of your Stripe account
- Showcases your business’ product and/or services with descriptions, images, or listings
- Clearly states pricing details
- A visible refund or cancellation policy
- Fulfillment information on delivery timelines and digital access processes
- A way for clients to contact the business by phone, email, and/or contact form
- Next, include a Product Description of what products or services your business sells
- Select Continue
- Next, choose an Industry
- For your bank information, either login to your bank account online and choose an account, or enter your bank account's details manually and select Continue
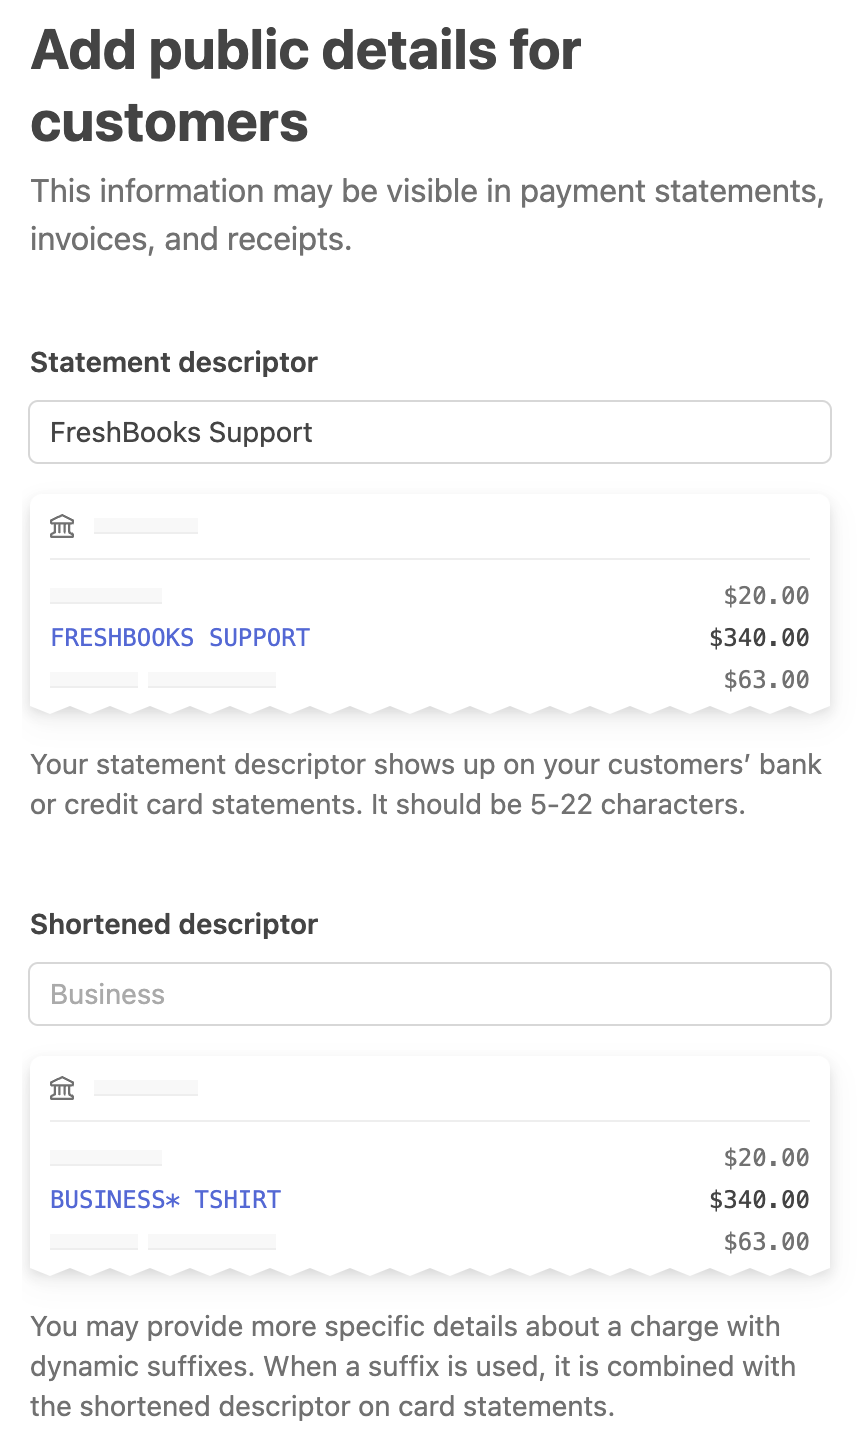
- For your public details, specify a Statement Descriptor and Shortened Descriptor that will appear on your clients' statements
![Public details section with preview of statement descriptors.]()
- Next, review or enter a Customer Support Number, and if available, a Customer Support Address
- Then select Continue
- In the review section, ensure your information is correct, then select Agree and Submit. You'll be taken back to FreshBooks. FreshBooks and Stripe will review your submission and notify you by email if your application review is approved or if additional documentation is required.
Additional Information
Sometimes FreshBooks Payments may require additional information to verify your account. To submit additional information, use the below steps:
- On the Dashboard, in the banner, select the Submit Information button
![Banner with submit information button.]()
- Follow the instructions to submit the information required and select Confirm to finish.
Stripe Standard Invoice Migration Process
Once your FreshBooks Payments account’s status for Online Payments is set to active, the following will occur:
- During the migration process, your invoices will be updated automatically to remove Stripe Standard as the payment option for online payments and replaced with FreshBooks Payments instead
- Any paid invoices will not be impacted
- Any invoices currently in processing status through Stripe Standard will be left alone to allow payments to finish
- Invoices with saved credit card and bank transfer information through Stripe Standard will be updated to be saved through FreshBooks Payments instead
- The process of updating invoices can take up to a minute - during this time, you can keep using your account while staying logged in, this will not disrupt the update process
- Once the updates are finished, a pop-up will display informing you that FreshBooks Payments is now your default payment option. Stripe Standard will remain as an available payment gateway in your FreshBooks account, but will no longer be connected to your Stripe account.
Notes:
- Once your FreshBooks Payments powered by Stripe account has been set up, review How do I manage my FreshBooks Payments account? for information on your account’s status, payouts, disputes, and more
- Once your FreshBooks Payments account’s Online Payments status is set to active, you can begin accepting payments on your invoices, recurring templates, and more
- Your Payouts status must be set to active to receive the payments in your connected bank account
WePay to FreshBooks Payments Users
WePay announced that it will be gradually shutting down online payment operations. As of June 26, 2024, you will no longer be able to process online payments through WePay. FreshBooks Payments powered by Stripe is now the new online payment processor for businesses based in Canada and the United States.
If you’ve missed your WePay migration deadline on your email communications, you can sign up for FreshBooks Payments using the steps in How do I accept online payments with FreshBooks Payments powered by Stripe?.
WePay Closure Details
- WePay Account Closure - Your WePay account will be closed on January 10, 2025 after all payments have been settled, review Manage Your WePay Account below for more details
- Invoices - All invoices and recurring templates that are set up to accept online payments through WePay have had WePay removed, update your invoice’s online payment settings to FreshBooks Payments or a different option to continue accepting online payments
- Recurring Payments on Recurring Templates - Any saved credit card and bank transfer information saved with WePay have been removed, update your recurring template’s online payment settings and have your clients re-enter their information
Manage Your WePay Account
Moving forward, you can access your WePay account anytime by logging into your WePay dashboard directly. Your WePay account will remain active until January 10, 2025 to support deposits to your bank account, refunds, and chargebacks. Log into your WePay account anytime at WePay’s login here.
For US businesses, WePay will also send the 1099-K form by January 31, or you can reach out at taxes@wepay.com.
WePay Reports for Transactions
If needed, you can download reports from your WePay dashboard for your records, including your payment history. You can use the below steps to download a specific CSV file of all activity or a specific type:
- Log into your WePay account
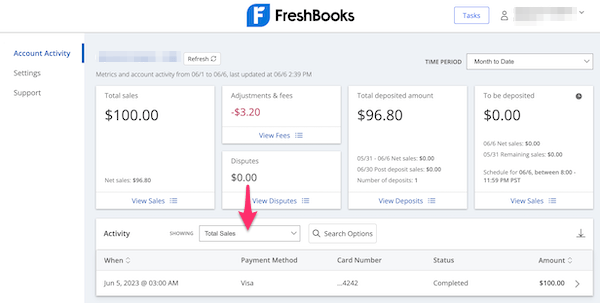
- While on the Account Activity tab, in the Activity section, select the dropdown next to Showing
![Dropdown to filter transactions by inside WePay account on Account Activity section.]()
- Choose Total Sales, All Activity, or Deposited Amount
- If needed, select Search Options button
- Then select the Please select a date range dropdown and choose between Today, Yesterday, Last 7 Days, Month to Date, or Custom
- Select Search
- Above the list of results in the top right corner, select the down arrow and a CSV file will begin downloading.
![Download button in top corner of list of transactions to download file.]()
Close your WePay Account
Before you can close your WePay account, ensure that there is no more activity in your WePay account by checking for the following:
- All processing payments have been marked as paid
- All payments in transit have been settled into your bank account
- There are no refunds in progress or all refunds have been completed
- There are no open chargebacks or all open chargeback disputes have been resolved
When your WePay account is ready to be closed, use the steps in How do I delete my WePay account?. Otherwise, WePay will automatically terminate your account for you on January 10, 2025.

